Prepaid passes partner setup.
Design pass products per club, price them, and keep sold passes safe through edits.
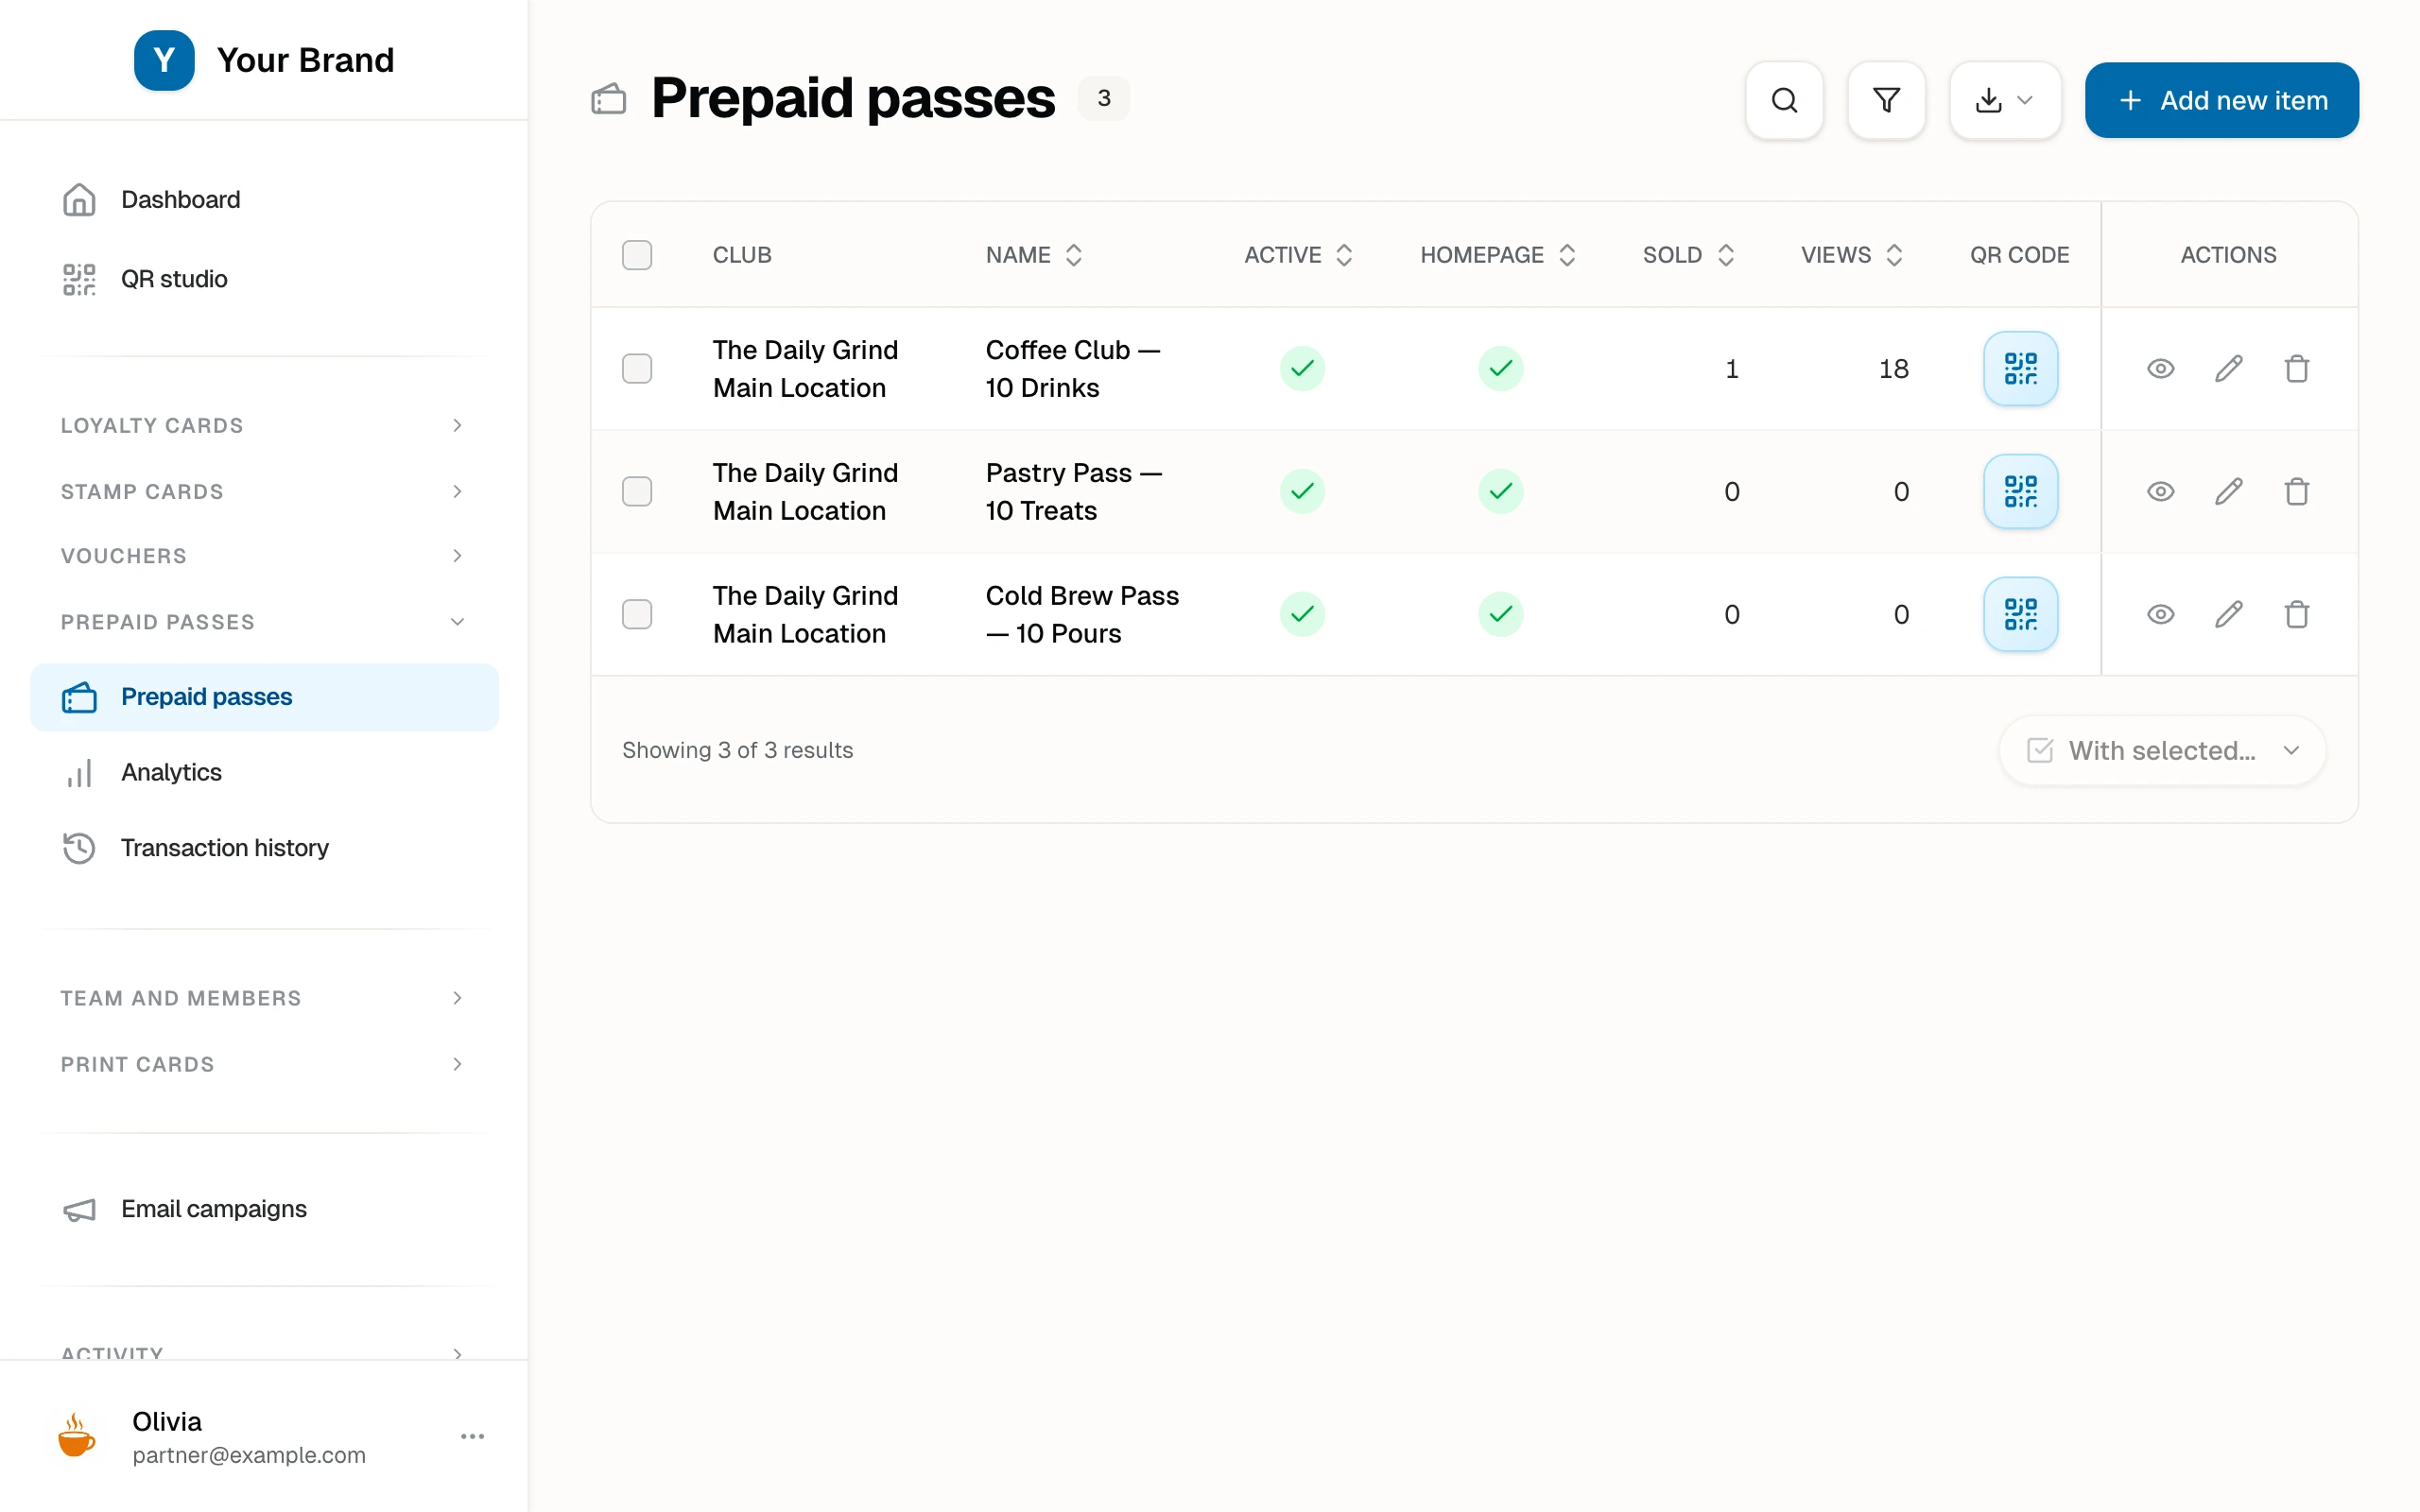
You design pass products in the partner dashboard under Prepaid passes. Each product belongs to one club, so staff sell and scan only the passes of their own club.
Creating a pass product
- Go to Prepaid passes and choose Create.
- On Details, pick the club, name the product the way a customer would say it (for example "10-Wash Card"), and keep the product active. The name appears in the member wallet, on the staff counter screens, and on the receipt.
- On Content, write one sentence on what the pass covers.
- On Pass, set the two dials:
- Number of uses. How many visits the pass covers. Leave it empty for unlimited visits.
- Valid for. Days the pass stays valid after the sale, between 1 and 366. Required when uses is empty; optional for counted passes. A counted pass without a window never expires.
- Set the price your counter charges. The platform records it with each sale for receipts and reports; payment happens at your till.
- On Design, style the pass the way members will see it in their wallet: background and text color, an optional background image, the overlay opacity that blends the color over the image, and an optional logo shown next to the pass name. The same options exist on loyalty cards, stamp cards, and vouchers.
- Save.
Two shapes cover the common products:
| Product | Uses | Valid for |
|---|---|---|
| 10-wash card | 10 | empty, or e.g. 365 days |
| Monthly unlimited | empty | 30 days |
The counter QR code
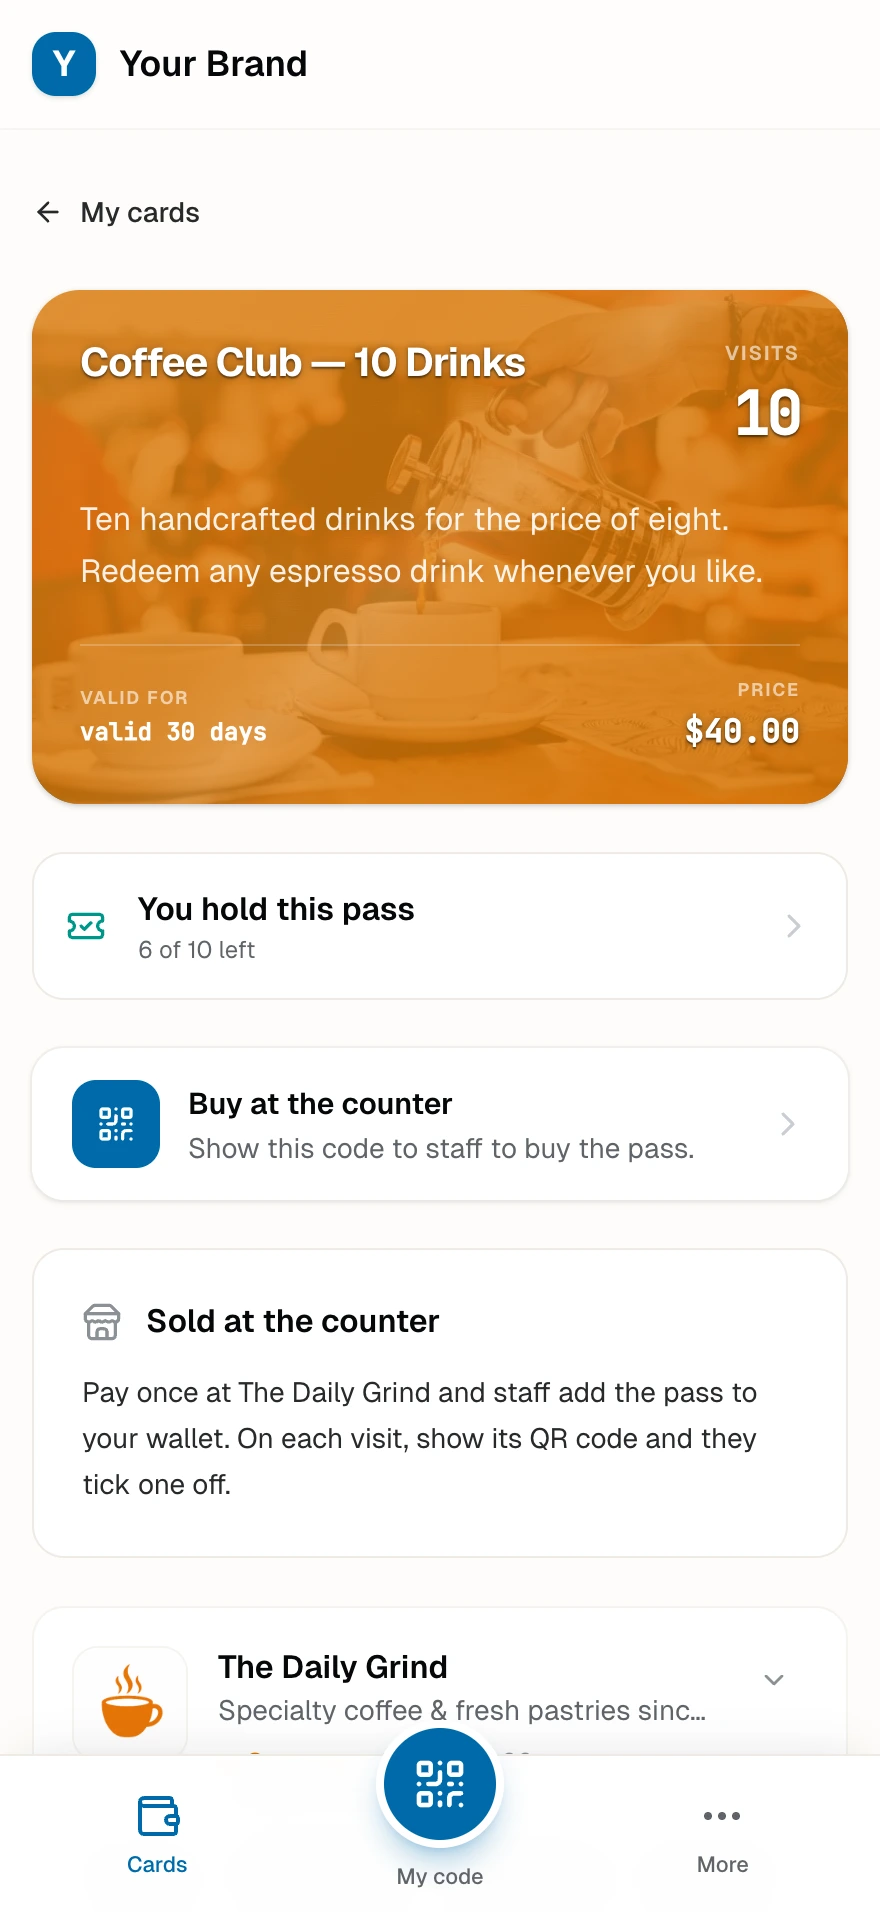
The pass list and detail view carry a QR code per product, like every other card type. It opens the pass's public product page: what the pass covers, the validity, the price, and that staff sell it at the till. Print it for the counter or a window sticker; a customer who scans it sees the offer before they reach the register, and a member who already holds the pass gets a shortcut to their remaining count.
The page is link-only by default: the address contains an unguessable ID, and the pass stays out of every public listing until you switch on homepage visibility. Deactivating or deleting the product takes the page offline.
Homepage visibility
Each product carries a Visible on homepage for all visitors toggle on Details, off by default. With it on, the pass appears on the public homepage for anyone to discover; with it off, the product page stays unlisted. This is one distribution choice, not a gate: the printable counter QR and the direct link work either way, as they do for vouchers.
The toggle appears only when your administrator granted you the homepage permission, the same permission that governs homepage listing for your other card types. With the permission granted, the product list adds a Homepage column so you can see at a glance which passes are published.
Analytics and transaction history
The Prepaid passes menu carries the same two companions as your other card types: an Analytics page per product (views, sales with recorded revenue, visits used, active passes, and unused expired visits) and an exportable Transaction History of the full pass ledger. Analytics & History covers both in depth, including what each metric tells you.
Editing and deleting
Every sold pass froze the product values at its moment of sale. Edits apply to future sales. Lowering the use count, raising the price, or shortening the validity touches no pass a member holds.
Deleting a product removes it from sale and from your list. Sold passes keep working until they are used up or expire. There is no way to revoke a pass a member paid for from the dashboard; that conversation belongs at your counter.
Plan limits
The number of pass products you can create depends on your plan, the same way voucher limits work. When you reach the limit, the create button explains the block; existing products and sold passes stay untouched. Your administrator can raise the limit per partner.
Google Wallet
When the administrator granted your account the Google Wallet permission, each pass product has a Google Wallet toggle on Details, off by default. With the toggle on, members see an "Add to Google Wallet" button on their pass, and the wallet copy updates after every visit. See Google Wallet for the integration setup.
What partners see
The product list leads with the club and product name, then shows each product's uses, validity, price, how many passes staff sold from it, and how often its page was viewed. You can sort by the number sold to see your best sellers first. On narrower screens the uses, validity, and price columns step aside so the list stays easy to scan. Sales, visits, and corrections appear in the activity log as pass events, with IDs only.