Integrations overview.
Introduction to connecting external platforms with your loyalty program.
Early Access: The Shopify and WooCommerce integrations are available for early access. Try them out and share your feedback. Your input shapes how these features evolve. Some functionality may change as we refine the experience.
Integrations connect your loyalty program to external platforms, letting customers earn points when they shop online, and letting your own tools hear about loyalty activity as it happens. The system handles order processing, point calculations, and pass updates for you, and the points land on the same balance customers collect at your counter.
Available integrations
| Platform | Status | Description |
|---|---|---|
| Shopify | Early Access | Connect your Shopify store for automatic point earning and a storefront widget |
| WooCommerce | Early Access | Connect your WooCommerce store for automatic point earning and points-to-coupon redemption, no plugin required |
| Google Wallet | Available | Let members save cards, stamp cards, vouchers, and prepaid passes to Google Wallet |
| Apple Wallet | Available | Let members save signed cards, stamp cards, vouchers, and prepaid passes to Apple Wallet |
| Outbound webhooks | Available | Send signed loyalty events to Zapier, Make, or your own tools after loyalty activity |
| More coming soon | Planned | Additional platforms in future releases |
Each integration is independent. Run one, or run Shopify and WooCommerce side by side for different stores.
Prerequisites
For Shopify and WooCommerce, you need:
- At least one Club created
- At least one active Loyalty Card
- Partner dashboard access
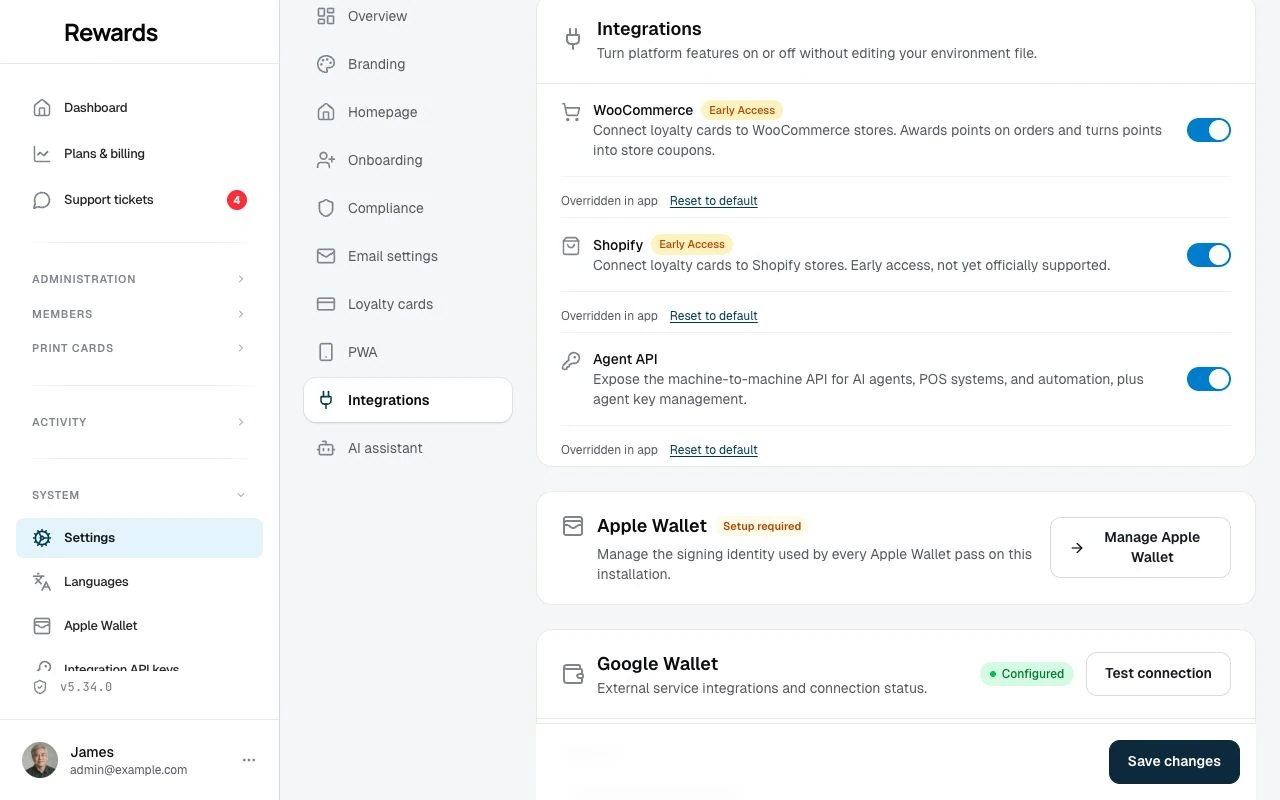
Enabling a feature: Shopify and WooCommerce each sit behind a feature switch. An admin can turn one on from Settings → Integrations in the dashboard, which is the quickest path and needs no restart. The matching
.envflag (FEATURE_SHOPIFY,FEATURE_WOOCOMMERCE) sets the default; a saved dashboard switch takes precedence. See System settings. Google Wallet, Apple Wallet, and outbound webhooks come with a partner's plan. Gold and Platinum include both Wallet options by default; each also needs its platform credentials or signing identity. See Getting started with outbound webhooks below.
Getting started with Shopify
The Shopify integration is behind a feature switch. Turn it on from Settings → Integrations, or set FEATURE_SHOPIFY=true in your .env file, then follow these guides:
- Connecting Your Shopify Store - Link your store, enable demo mode, and manage your connection
- Shopify Widget Installation - Add the loyalty widget to your Shopify theme
- Shopify Settings & Point Rules - Configure how points are calculated and customize the widget
Getting started with WooCommerce
The WooCommerce integration is behind a feature switch. Turn it on from Settings → Integrations, or set FEATURE_WOOCOMMERCE=true in your .env file, then follow the guide:
- WooCommerce - Connect with REST API keys, configure point earning and the points discount, monitor the connection
The connection needs no WordPress plugin: the partner pastes the store URL and an API key pair, and the platform registers the required webhook by itself.
Getting started with Google Wallet
The Google Wallet integration requires a Google Cloud project and a service account. Add the credentials in Settings → Integrations (the Google Wallet card) or in your .env file. Google Wallet itself is enabled per plan (Gold and Platinum include it by default), so make sure the partner's plan includes it, or grant it on the partner's Permissions tab. Then follow the setup guide:
- Google Wallet Integration - Full setup for admins, partners, and members
Getting started with Apple Wallet
An administrator adds one Apple Pass Type ID signing identity for the installation under Settings → Apple Wallet. Apple Wallet is enabled per plan, with Gold and Platinum on by default, and an administrator can grant or revoke it for one business. Then follow the setup guide:
- Apple Wallet passes - Certificate setup, business controls, member use, testing, and support
Getting started with outbound webhooks
Outbound webhooks comes with a partner's plan, not a feature switch. Gold and Platinum include it by default; Bronze and Silver do not. An admin turns it on for a plan from Admin → Plans & billing → Plans, and can grant or revoke it for one partner from Administration → Partners → Permissions. Once a partner is entitled, follow the guides:
- Webhooks overview and setup - Register an endpoint, then read the event catalog and verify signatures
- Connect any POS - Pair these events with the purchase API to connect a till or automation flow
- Automation templates - The same connection prebuilt for Make, n8n, and Zapier
Building your own
For platforms without a native integration, the Agent API supports custom storefront and POS integrations. The e-commerce guide walks through the recommended architecture.
Related topics
- Creating Loyalty cards: Set up your loyalty card first
- Creating Rewards: Define what customers can earn
- Understanding Clubs: Organize your business structure
- Shared Wallet Concept: Why one balance works across channels
- Apple Wallet passes: Signed passes for iPhone and compatible Mac devices
We'd love your feedback! We're improving integrations based on real-world usage. If you run into issues or have suggestions, share them through the feedback system. It helps us prioritize what to build next.