Creating rewards.
Define what customers can earn with their points
Rewards are the incentives that make your loyalty program valuable. Customers save points to redeem them for rewards you define.
Before creating cards
Create your rewards before creating loyalty cards. When you build a card, you'll select which rewards it offers.
Creating a reward
- Go to Rewards in the partner sidebar
- Click Create Reward
- Fill in the details:
| Field | Description |
|---|---|
| Name | Internal name for the dashboard (e.g., "Free Coffee"). The translated Title in Content is the name members see. |
| Description | Details about the reward |
| Points Required | How many points to redeem |
| Active from | Configured start date, required in the dashboard form |
| Ends on | Required end date. The creation form starts with a date one year ahead; you can change it. Expired rewards leave card pages. |
| Active | Whether this reward is available |
- Click Save
The reward list and details show Status under the existing claim rules: Available when Active is on and the expiry date is still ahead, Expired after expiry, and Inactive when you turn Active off. An old record without an expiry date shows Unavailable. Existing redemption records stay in history.
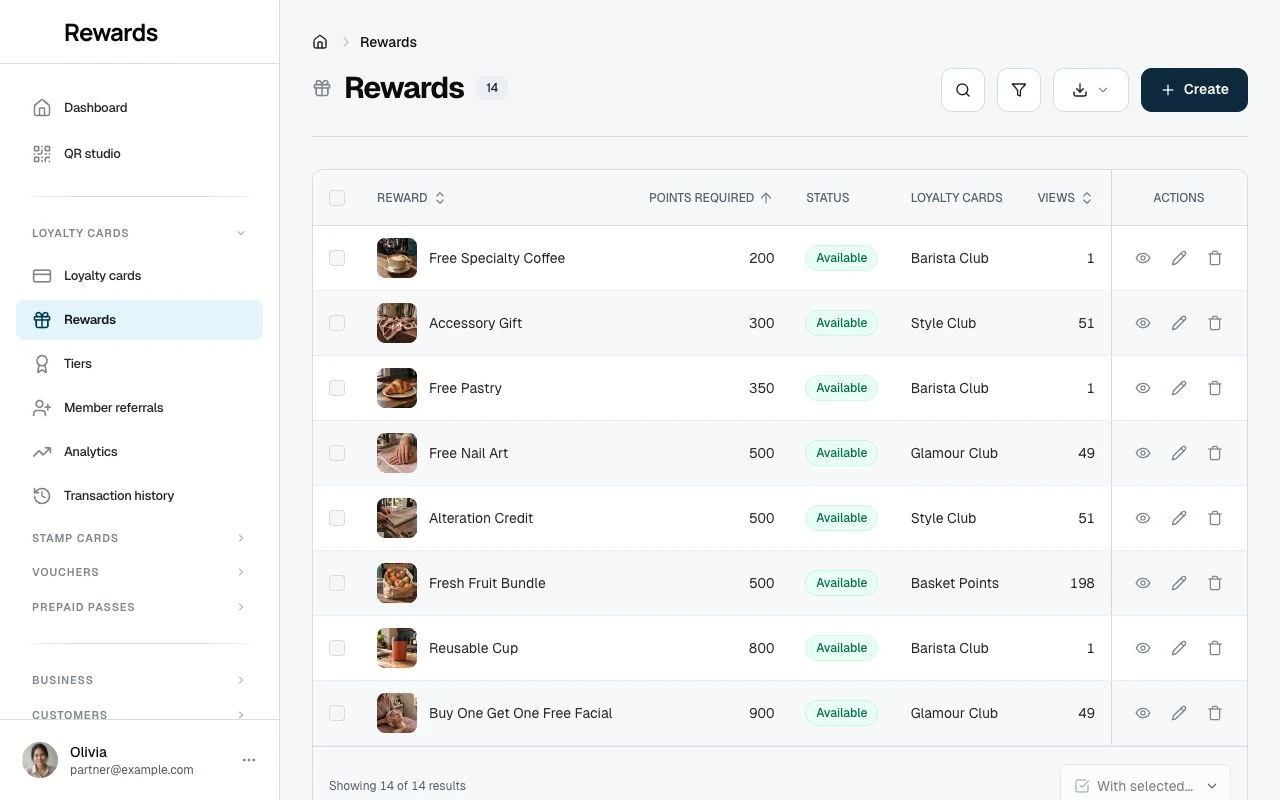
The reward list puts the main image beside its internal name, followed by the point cost and status. It starts with the lowest point cost; choose a column heading to change the order. Views counts page views.
Loyalty cards shows up to two internal card names. Select +N to see every linked card. No linked cards means you have not assigned the reward to a card. On phones, open Details for the linked cards and Views.
To find rewards for one card, open Filters and choose Loyalty card. The choices include your inactive cards and cards with no rewards. The filter follows the selected card when you rename it. Assign or remove rewards in the card's Rewards section.
Use Details, Content and Design to configure a reward. When e-commerce settings are available, E-Commerce follows Details, before Content and Design.
The Design tab holds up to ten optional photos of the reward: a main image plus nine more slots. The upload fields appear in two columns on larger screens and one column on phones. A good photo sells the reward, so add at least the main image. On small screens, the thumbnail strip scrolls to keep the selected photo visible.
Each photo accepts JPEG, PNG or GIF, from 320×240 to 1920×1440 pixels, up to 20 MiB. Lower hosting limits may apply to each file and to all photos submitted together; see artwork upload limits.
Reward examples
Coffee Shop:
- Free Small Coffee: 50 points
- Free Large Coffee: 80 points
- Free Pastry: 100 points
Restaurant:
- Free Appetizer: 150 points
- 10% Off: 100 points
- Free Dessert: 200 points
Retail Store:
- $5 Store Credit: 100 points
- $10 Store Credit: 180 points
- 15% Off Purchase: 250 points
Setting point values
Consider your average transaction and desired redemption frequency:
Low threshold (50-100 points): Customers redeem often. Good for frequent, low-value purchases.
Medium threshold (150-300 points): Balance between accessibility and value. Works for most businesses.
High threshold (500+ points): Premium rewards for loyal customers. Creates aspirational goals.
Multiple tiers
Offer rewards at different point levels. This gives customers choices:
- Quick wins (low points) keep them engaged
- Premium rewards (high points) give them something to save for
Editing rewards
Open View to inspect Details, Content, Design and History, with e-commerce settings when enabled. The first available photo leads the overview; the other photos remain in Design. Select any displayed photo to open its full image.
Changes to rewards take effect at once:
- Increasing points: Existing balances still work toward the new threshold
- Decreasing points: Customers closer to redemption can claim sooner
- Deactivating: Reward no longer appears, but rewards already redeemed stay in history
Shopify discount settings
⚠️ Alpha Feature: Shopify settings require the integrations feature to be enabled.
If you have a Shopify integration connected, you can configure the store discount a reward will grant:
| Setting | Description |
|---|---|
| Enabled for Shopify | Mark this reward for storefront discount redemption |
| Discount Type | Percentage off or fixed amount |
| Discount Value | The discount amount (e.g., 10 for 10% or $10) |
| Code Prefix | Prefix for generated discount codes (e.g., "REWARD") |
Example setup:
- Reward: $5 Off Any Purchase
- Points Required: 500
- Discount Type: Fixed amount
- Discount Value: 5
- Code Prefix: LOYALTY
A redemption would grant a code like LOYALTY-ABC123 for $5 off.
In-widget redemption is not available in this release. The storefront widget shows your program and reward previews but does not redeem points, because its endpoints cannot verify who the shopper is. These settings prepare a reward for redemption once verified customer sign-in ships. See Shopify widget installation.
Configure these settings in the Shopify tab when editing a reward. See Shopify Settings for details.
Best practices
Be specific. "Free Medium Latte" is better than "Free Drink."
Keep prices fair. Points should feel valuable. If rewards cost too many points, customers lose interest.
Update by season. Special rewards during holidays drive engagement.
Prepare Shopify discounts. If you have a Shopify store connected, configure each reward's Shopify discount settings so they are ready for storefront redemption when verified customer sign-in ships.