
Install Reward Loyalty.
Upload the complete package, follow the browser installer, and check your first sign-in.
On this page
Install Reward Loyalty using your hosting file manager and web browser. Have your database and email settings ready before you begin.
Before you open the installer
- Prepare your hosting, including PHP 8.4.1 or newer and a database.
- Connect your web address and HTTPS.
- Gather your email settings.
Still choosing hosting? Start with Before you start and the hosting directory.
No scheduled task is required to get started. Core loyalty features work without cron, and the default setup needs no separate queue worker.
1. Download and extract the package
Download the complete installation package from your Reward Loyalty purchase. Extract it on your computer or through your hosting file manager.
The package opens at the application root. You'll see app, bootstrap, config, public, and other files. Upload all of them, including hidden files such as .htaccess, into the public web directory for your app's address.
Do not upload only the package's internal public directory. Install at an address such as loyalty.example.com, not example.com/loyalty. Keep backups outside the public web directory.
2. Open the browser installer
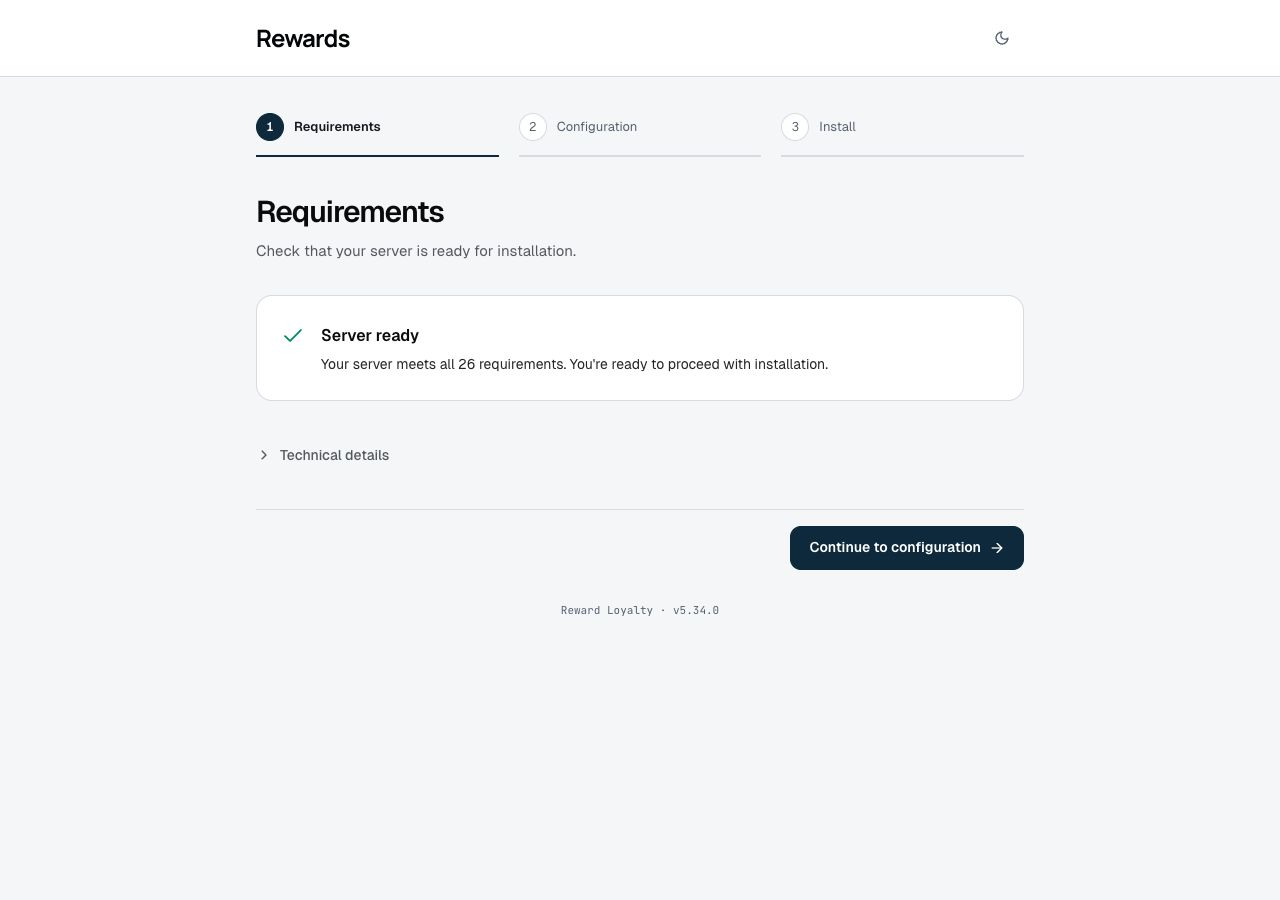
Visit your app's HTTPS address. The installer guides you through Requirements, Configuration, and Install.
Requirements
The installer checks your hosting. If a check fails, share the message with hosting support so they can adjust the setting.
Configuration
Enter your app's name and timezone, then create your admin account. The default app name is Rewards; replace it with your own name if you prefer.
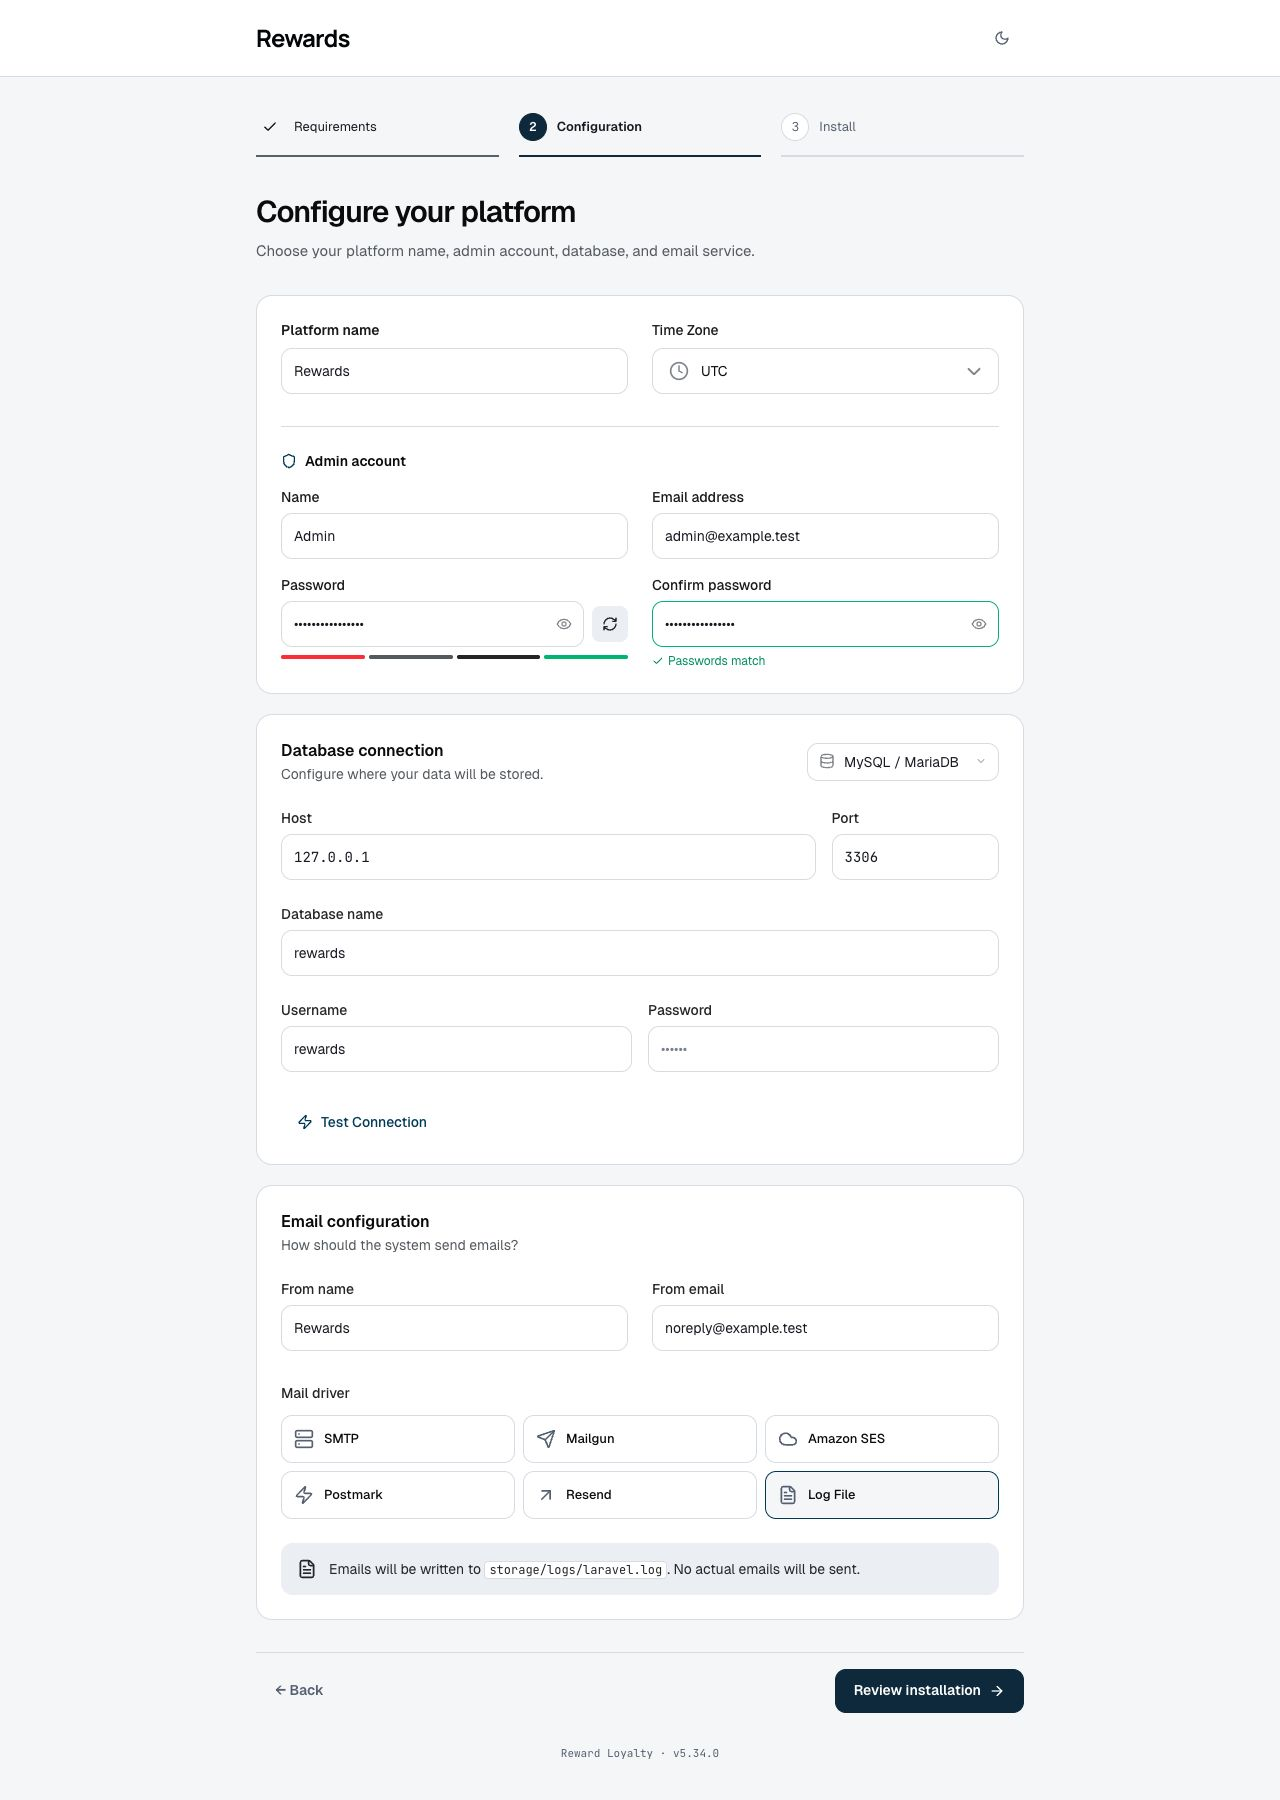
Choose MySQL or MariaDB for a live site and enter the database details you saved. SQLite is also available for evaluation and low-write installations.
Enter your email service settings. These let the app send sign-in codes and account messages. Use the installer's email test to check the connection.
Ready to install
Select Review installation and check your choices.
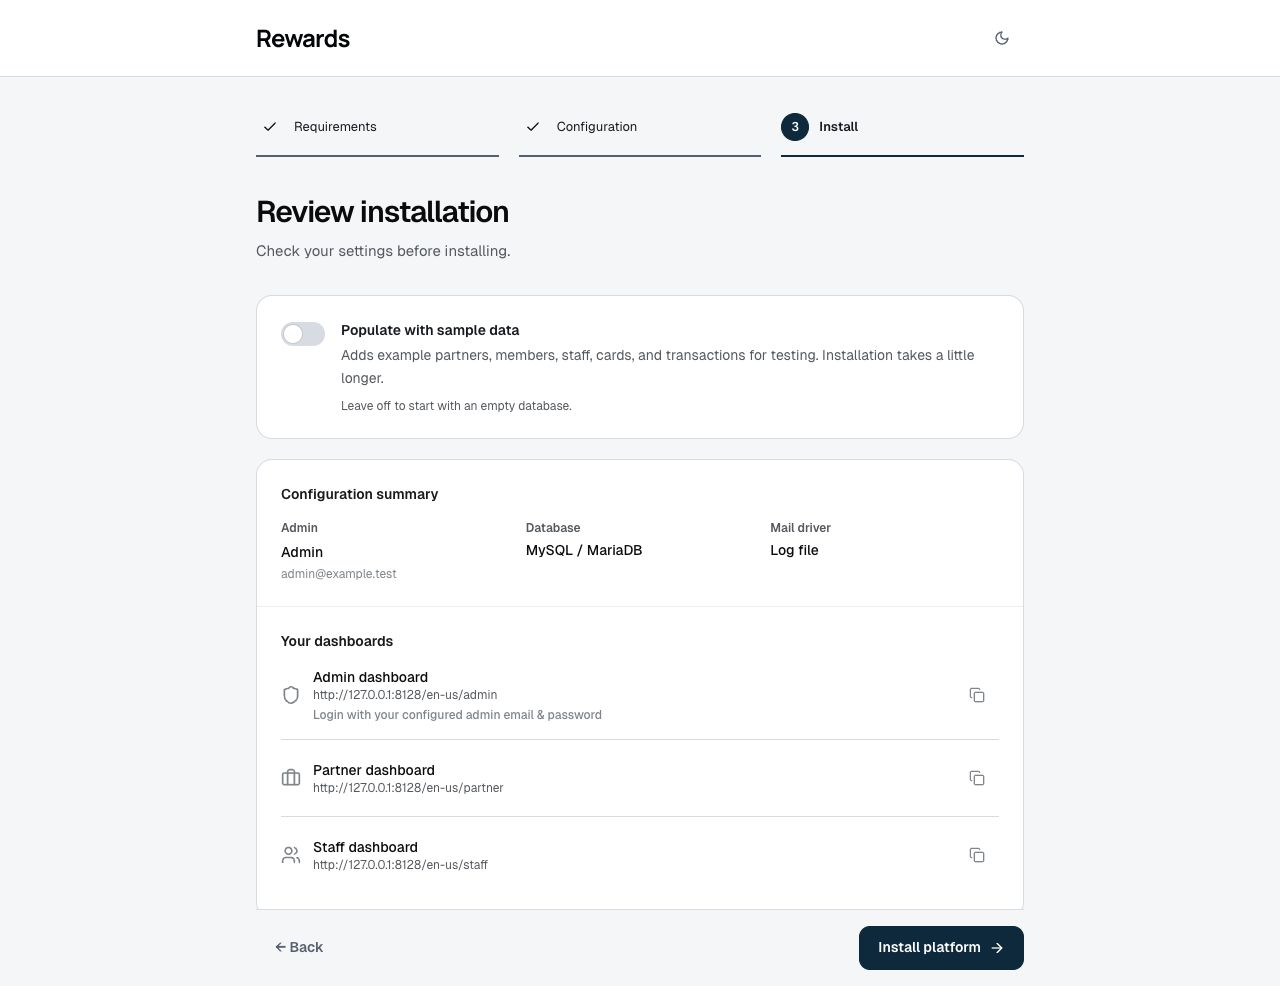
Leave Populate with sample data off for a live customer program. Use it only for a separate demo or test installation: demo resets can erase that installation's data.
Start the installation and keep the page open until it finishes. If a field needs attention, the installer marks it for you. If it reports a connection or hosting error, check the details or share the message with support.
3. Check your installation
The installer opens admin sign-in when it finishes. Follow After you install to check your sign-in code (OTP), a staff checkout, and an image upload before inviting members.
Before your first update
Use a private test copy, also called staging, to try updates before applying them to your live site. Give it a separate database and keep it private. Activation supports up to three domains; the purchase terms define the permitted production installation and test copy. See Private test copies and backups.
Reset a reusable demo installation
If you run a separate sales demo, the demo installation guide explains how to restore its sample data. Never run a demo reset against a live customer database.